Logged in? Great!
Now select an agent based on what task you want to be done with.
Step 1 #
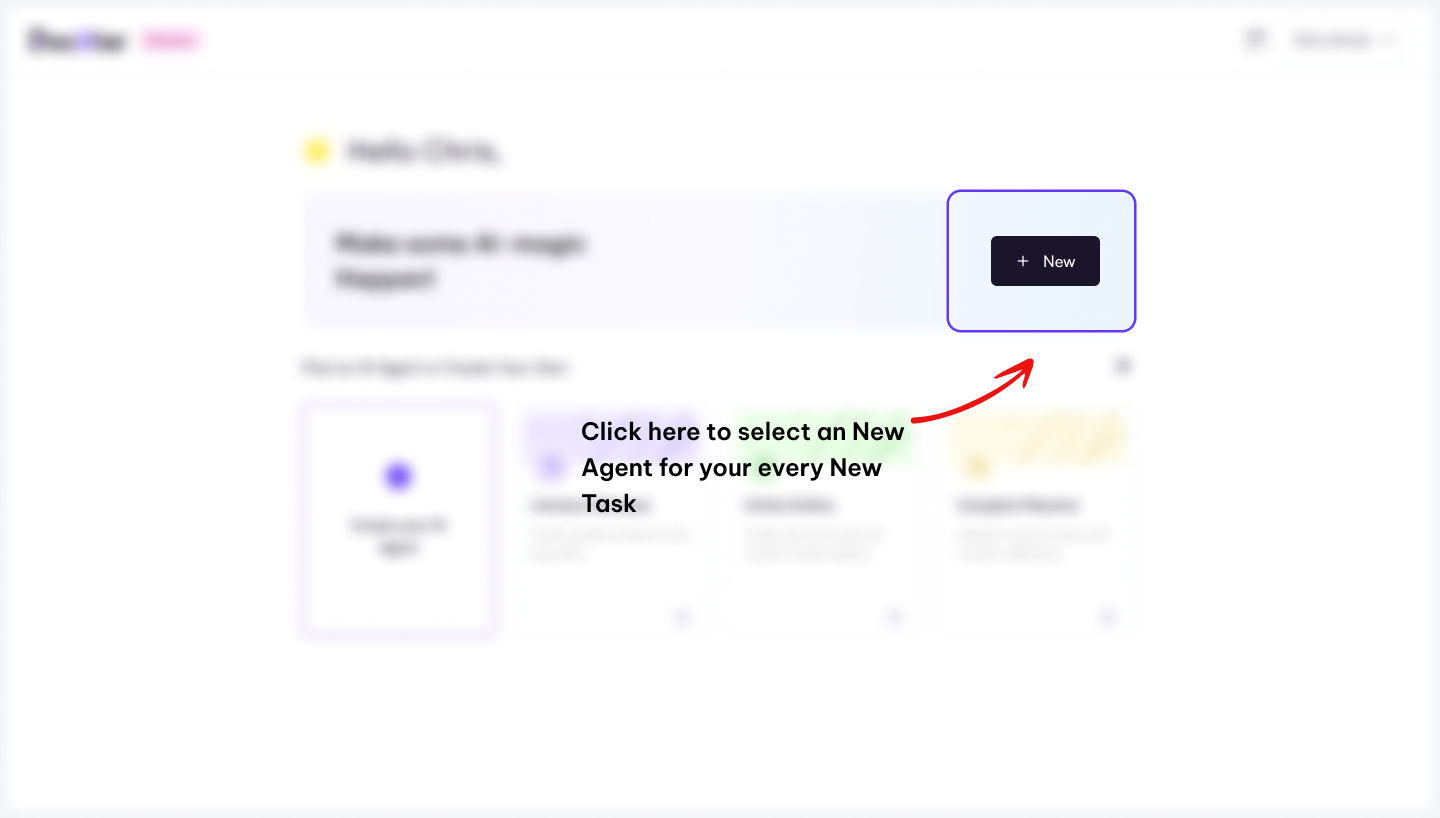
Locate the “New” button. The button is prominently visible on the dashboard. You can also start new by clicking on “New“, You will find this on the panel on the left.

Once you’ve found it, click the “New” button to select your AI Agent.
Step 2 #
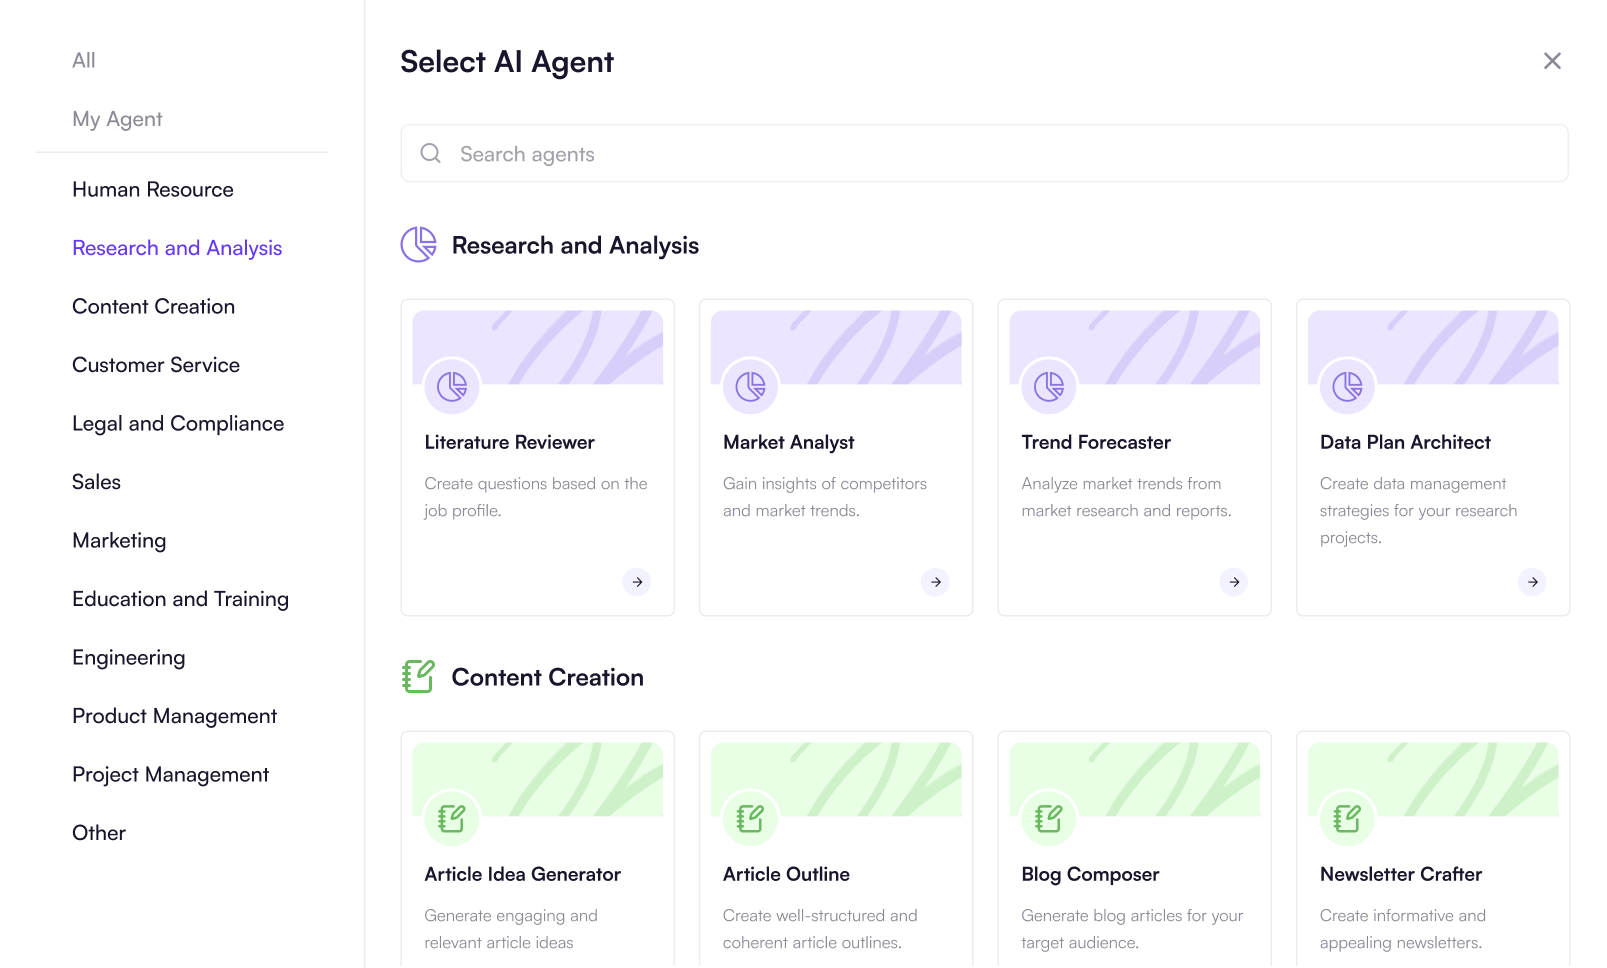
Select the agent you want to work with. A modal will open, allowing you to choose the appropriate AI Agents for your various tasks.

Step 3 #
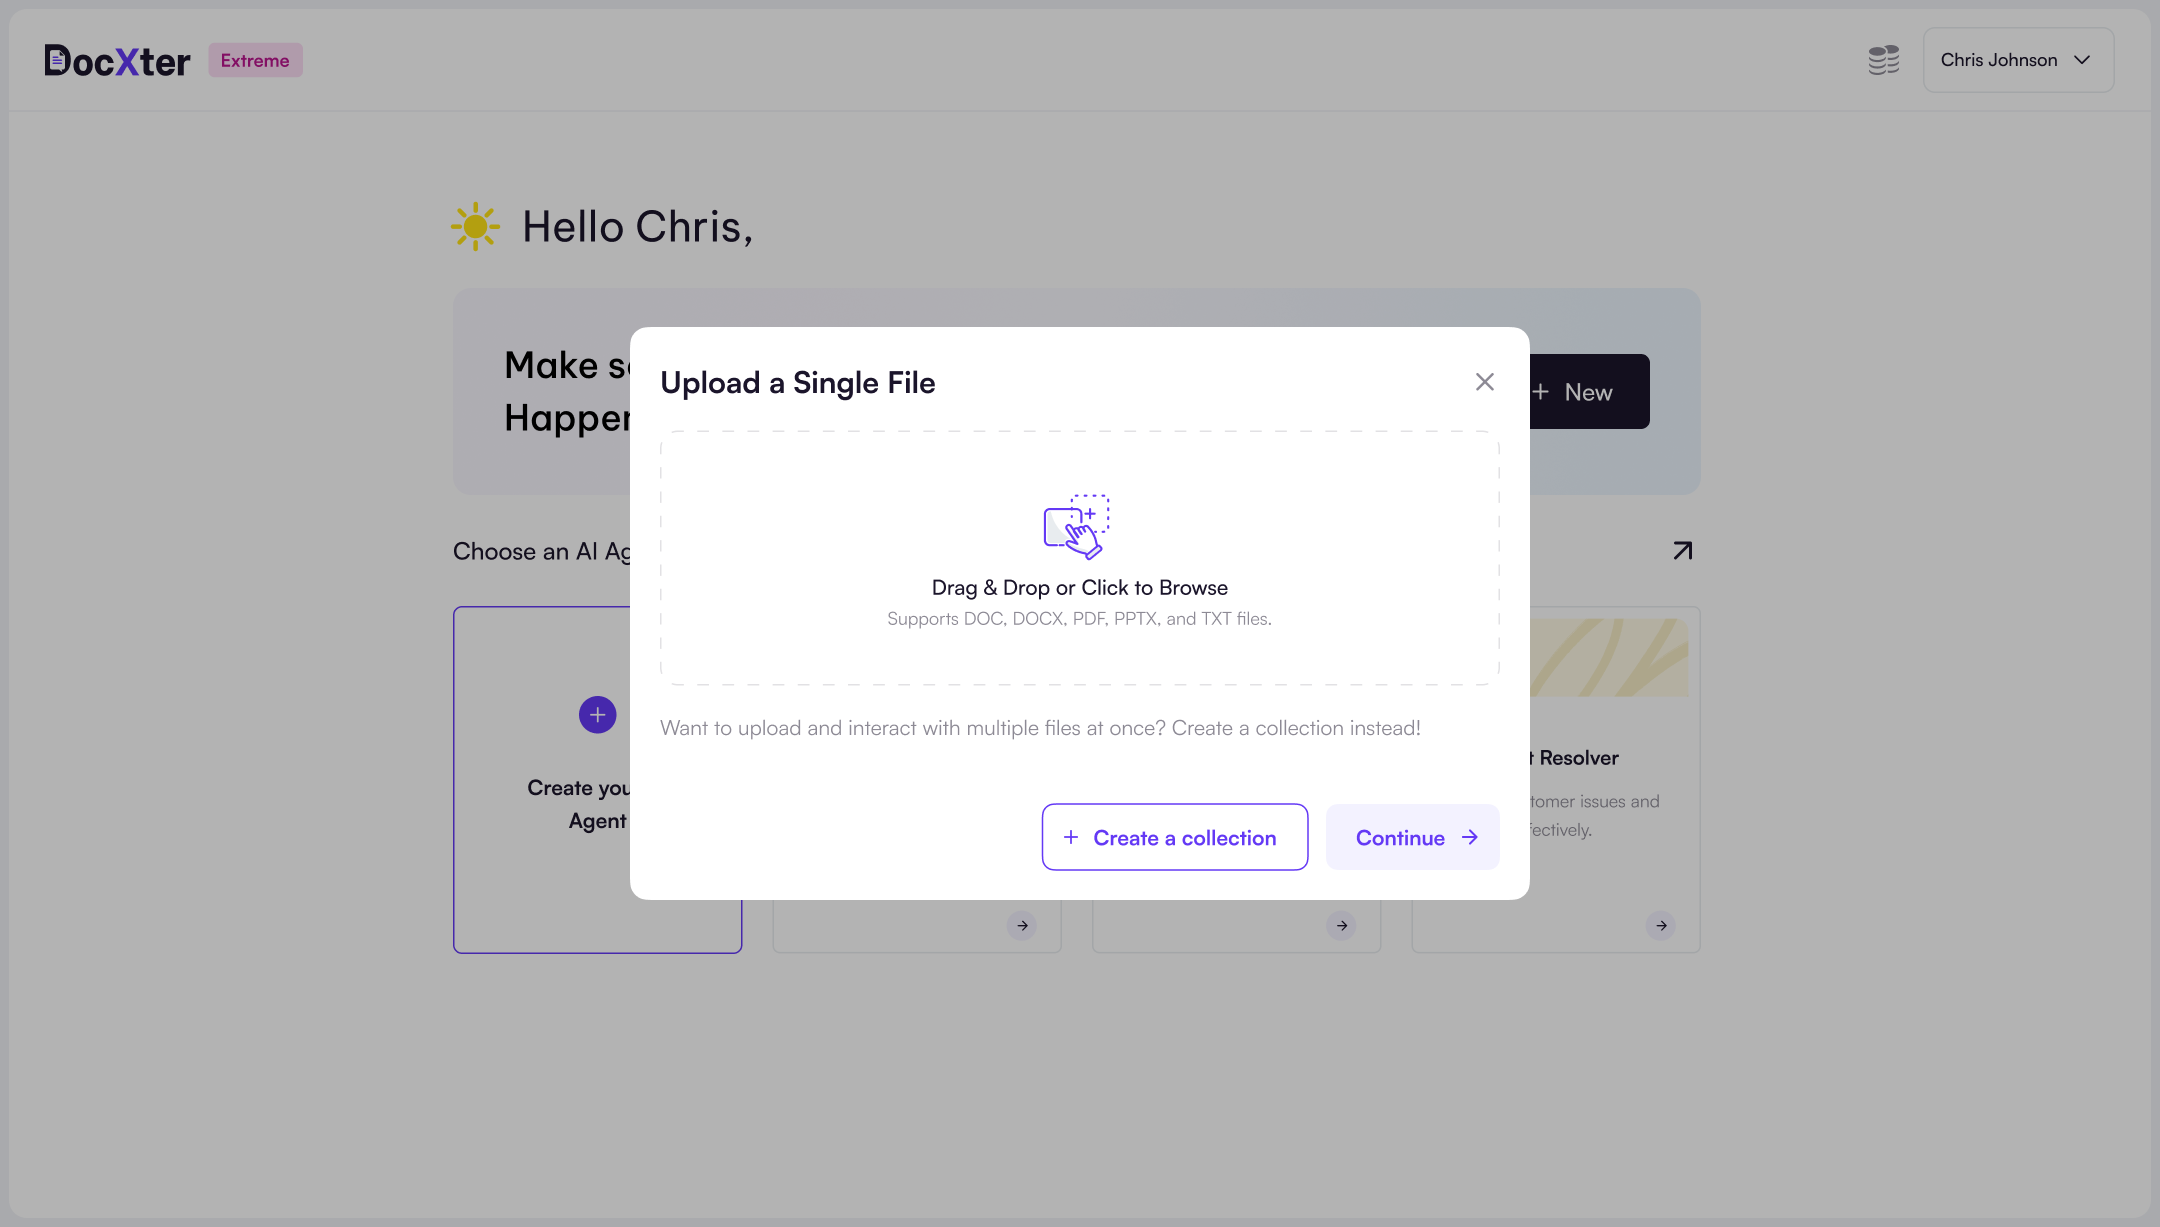
Upload your document or create a collection if you have multiple documents.

Step 4 #
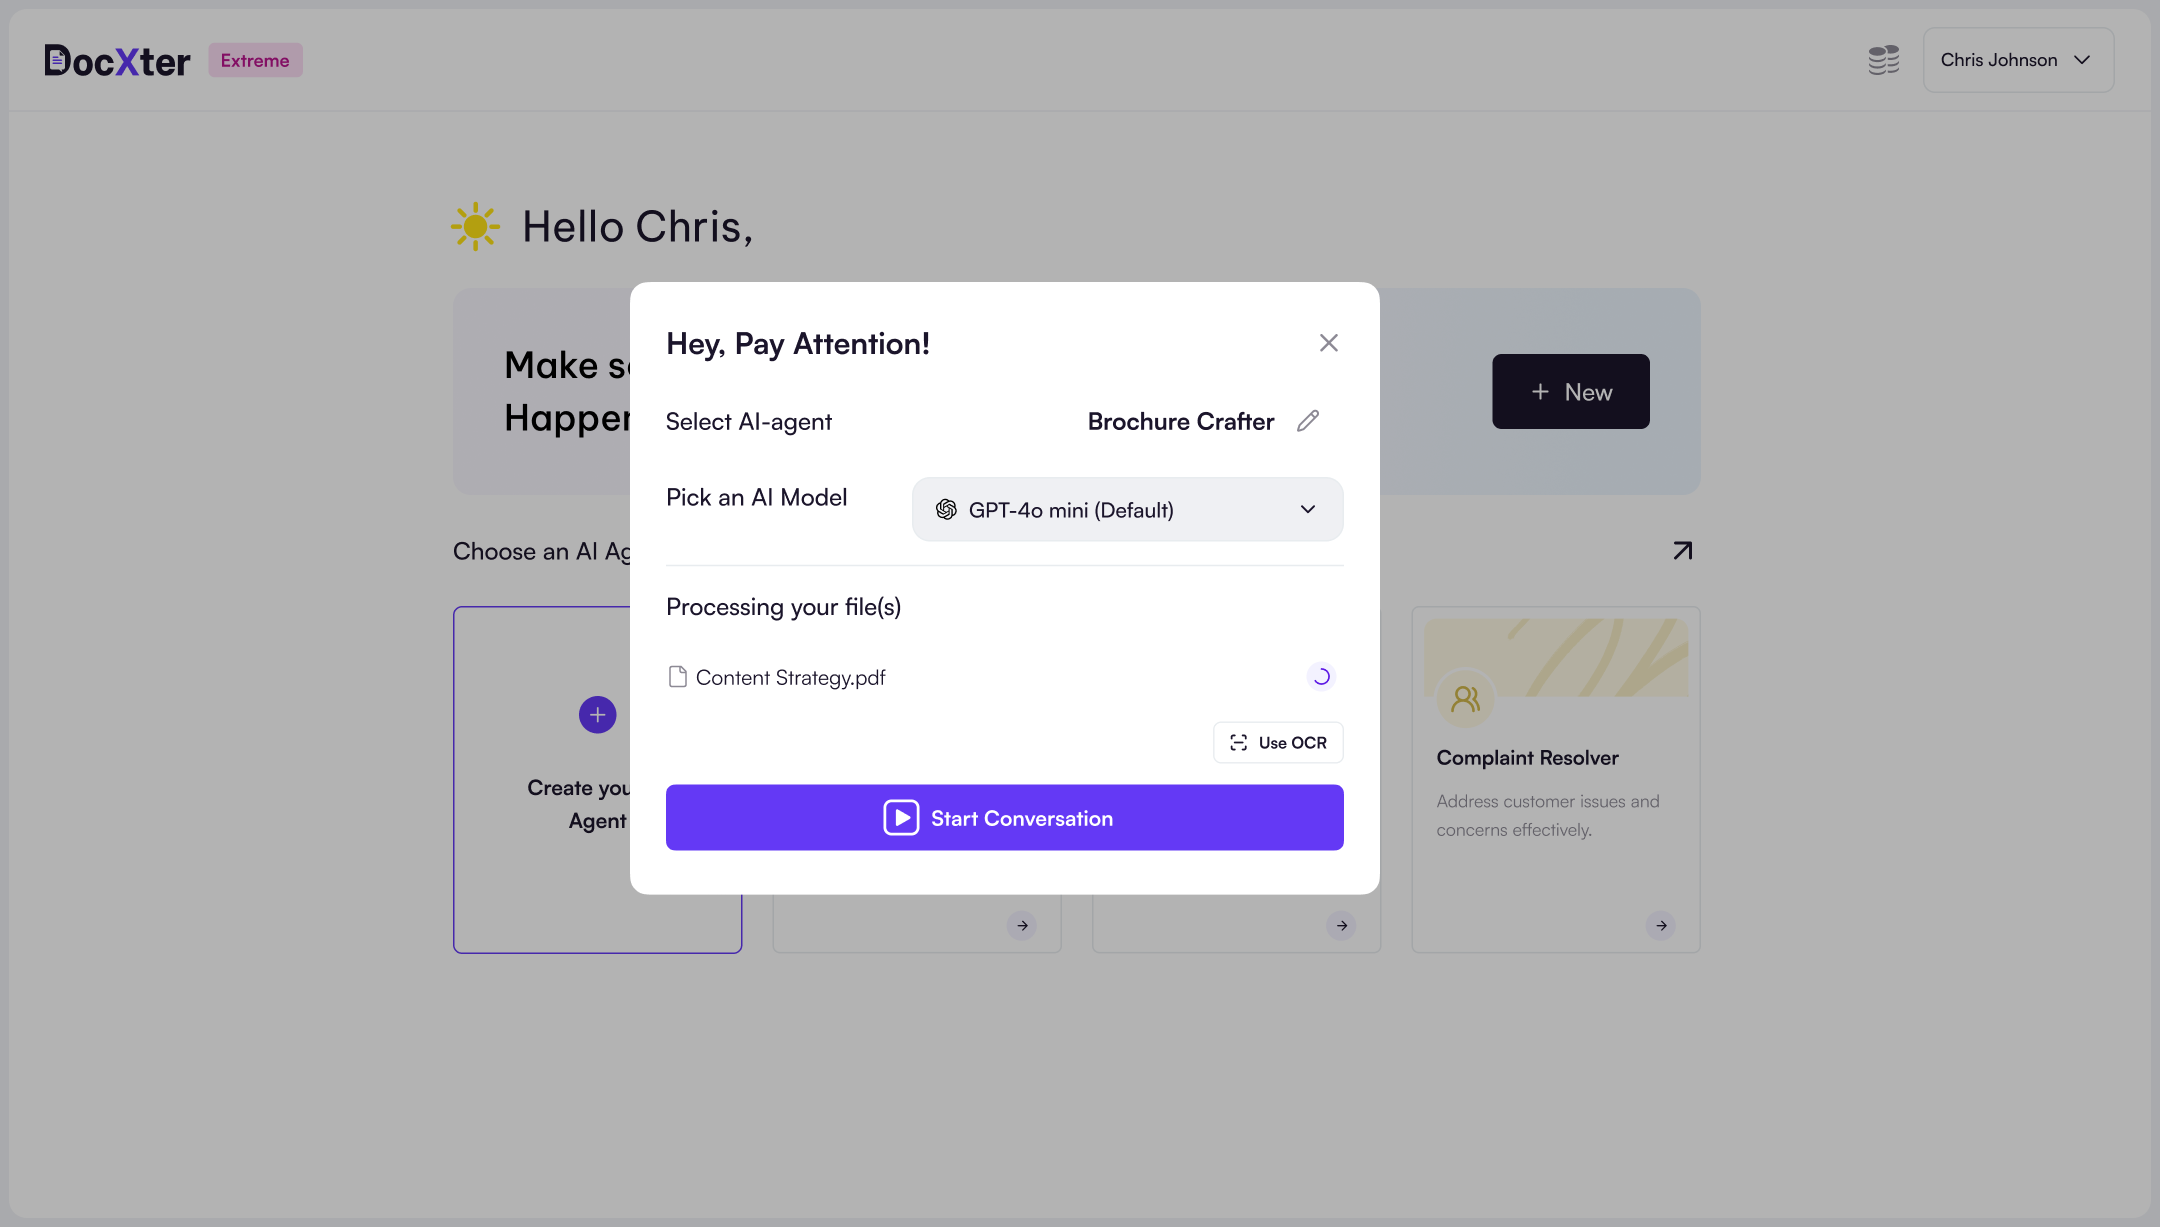
Once you’ve uploaded your document, select your AI model, and choose the OCR (Optical Character Recognition) option if your files contain images you wish to analyze. Know which AI models to choose here

Step 5 #
Once you’ve completed all the steps above, click on “Start Conversation“. DocXter will process it, introduce you to an agent you have chosen, and generate a clear and concise summary of the document’s content.
With your document uploaded and summarized, you can start your task! Get started quickly with the “Smart Actionables” below the summary.
If you have multiple files, learn how to upload them here.
To know how to interact with your document read Prompting With DocXter →
Leave A Comment